Friday, January 28, 2011

Roman Shades From Old Blinds (no sewing involved)

 
Ok so did I mention there is no sewing involved in the making of this Blind? :) Yep you heard me right, just some glue.  I was soo completley excited when I saw the Tutorial for this project, I cant even explain it. Its like when I heard the Beatles for the first time. Ok mabey i was'nt that worked up, I mean I didnt cry or anything... :) Well here are some pictures of the ones I made using this tutorial. It took me about an hour to do these, half of which I was entertaining my little one. A fairly simple project. I used some fabric from Walmart and spiced it up a bit by adding a black border with some ribbon. The cheap, plastic, grundgy blinds came with the house. I spent around $9 all together, it feels good to be soo cheap.

Here is the link for the tutorial, let me know if you have any ?'s or comments:


Friday, January 21, 2011

"Whoo Whoo" Owl Crinkle Baby Toy

My Owl Creation
I made this little guy for my nephew
I added little ribbon tags for grips

This toy is soo neat, for the crinkle noise you put a wipes wrapper in with the stuffing.
This project is super-dooper fast and e-a-s-y.
Hope you enjoy, cant wait to see your take on this one!
To make your own get the Tutorial at Craft Stylish, just click to link below
http://www.craftstylish.com/item/45013/how-to-make-a-felt-baby-toy-with-a-crinkly-crackly-recycled-surprise

Monday, January 17, 2011

"Hello, my name is Audrielle and I'm addicted......to SKIRTS"

Friends and family no need to worry for me i think this one will cure itself in time. I just love making skirts for my baby to show off her chubby little legs! So adorable. I think when she hits her teen years I will be soo over them its not even funny, but until then I'll just indulge myself in making more of these little numbers. I thought I would share with you all where to go to get your Skirt Fix.

The Bubble Skirt:


sewhipmama
Click Here for a Tutorial
(I kinda did my own thing on this one but I confused even myself so I have serious doubts
so I'll keep the way I did mine to myself & send you all to someone who can explain it! )


The Circle Skirt:


Click Here for the Tutorial


Well thanks for stopping by! Let me know what you think. If you make one you should post a picture, that would be fun :)

Wednesday, January 12, 2011

Home Sweet Home Biscuits


I love these babies. They are seriously close to tasting as good as KFC's which are my favorite, close but not quite. I love bread with my meals. When I'm running low on time and letting bread take its sweet time rising for 2 hours is out of the question, I run to these quick fixes. They are soft and savory. Let me know what you think. Pictures are always welcome.

________________________________________________


Ingredients:
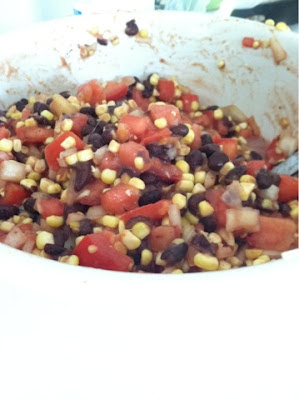
2 Cups Flour
2 Tsp. Sugar
1 Tsp. Salt
2 1/2 Tsp. Baking Powder
1/3 Cup Shortening
3/4 Cup Milk


Preheat oven to 450 deg.
Pour first 4 ingredients in mixing bowl. Mix together.
add shortening

mix shortening into flour mixture with hands or pastry blender.
mix until crumbles are on the small side, like so.

make well in the center of the mixture and add milk into it. mix.

mixture should look a little something like this. if its too soppy add another tablespoon of flour

turn dough out onto floured surface. knead to make mixture come together.
with a floured rolling pin roll dough out until its around 1 inch thick or around a milk cap high. do not roll too thin or you'll wind up with wimpy thin biscuits. roll less for thicker ones if you like yours a little meatier :)

cut biscuits out with floured biscuit cutter or heck use a floured drinking glass. whatever you have works. Try and get as many biscuits out of your mix as you can, so cut close together. When cutting these puppies out use an up and down motion. Dont twist your cutter while cutting these out, you'll pinch the edges closed and your biscuits wont rise up in the oven :(
Now that would be a drag

Place biscuits on greased baking sheet. if theyre stuck to the work surface try and pry them up with a thin, floured plastic spatchula.
Pop the tray in the preheated 450 oven
for 10-15 min or until golden brown
keep an eye on them

Vwoaalah-- golden brown, warm from the oven, homecooked biscuits.
spread some butter and jelly on 'em, honey and butter, or heck make
them into a meal...


biscuits and gravy,yummmm :P

Tuesday, January 11, 2011

Tutorial: Pom Pom Flower Headband


F

or my first tutorial ever I picked a fairly fast and easy item. It should only take around 15 minutes, with most of the time being spend on cutting. I decided on a Pom Pom flower, which I will be attaching to a homemade headband. However you can attach this to anything, pin it in your hair, on your tanktop sleeve, or on a string of pearls. Well i hope you have fun, let me know what you think. If you do this tutorial it would be super cool if you took pictures of how you decided to use your creation. Here are the items you will need for a Pom Pom flower Headband:
  • Gluegun
  • gluestick
  • scrap fabric
  • felt or some type of heavyweight fabric (color doesnt matter, petals will cover it)
  • pencil
  • something round to trace, (spice lids work well) around 1-2 inches
  • scissors 
  • elastic band (i used 3/4 width) available in the craft/sewing section
____________________________________________________


Take your lid and lightly trace in pencil 20-30 circles on the fabric color of your choice.
 Use pencil because your marks may show
up on the edges of your "petals".
Plug in your glue gun so it will be warmed up and ready to go :)


Now cut out your the circles you traced, circles dont have to be perfect.
Cut out an extra circle in felt around the same size as the circles you traced.


Now take one circle and fold completly in half, now fold in  a quarter, like so.


<><><><><><>
<>
Squeeze glue on the tip of the petal and secure to center of your base (felt circle).
Hold until secure, around 5-10 seconds.
<><><><><><>
Repeat. Work from center of the base outward. Like so.
Go until base is covered completly.


 Measure your head. Cut elastic 1/4 inch longer. bring ends of elastic together and overlap them 1/4 inch. Secure with generous dallop of glue, hold toether for 10 seconds. Squeeze glue ontop of overlap and secure finished, assembled Pom Pom to elastic band. Press down tightly for 10 seconds. Word of advise give the headband some time to dry before trieng it on. Wait about 30 min to give your glue some time to completly dry and be a strong adhesive.


Now finally put on something cute! Hope you enjoyed. Let me now if you have any questions or comments, Thanks!
___________________________________________________________________________________

Recipes


Home Sweet Home Biscuts


Tai Chicken Salad
(photo source: Taste Of Home)


For Canning or just to eat right away


Monday, January 10, 2011

Why? Because "too much on my plate" apparently isnt enough for me

Im constanly on crafting blogs and recipe website, so starting my own just made sense. I get asked for recipes and other such things all the time , so now there should be one easy place to go to to get them. I guess this is just my way of giving back after stealing soo much info from others :) I hope someone will benifit from this. Please comment so i know your out there


My name is Audrielle
Ive been married for 3 1/2 years
I am the mother to, yes, THE cutest 6 month old baby girl
I was raised in a SMALL town
I still live in a smallish town, I got annoyed growning up when people said they were from a small town and it had a Walmart and fast food. So i should be careful with my phrasing because there is a Walmart here. However no mall or Krispy Kreme in sight!
My relationship with my maker defines me, throughout my blog I will try and explain this, and not through the tired, heard a million times, this is how i feel. But hopefully with intelectual arguments, explinations, and facts, because out of all the things i have to give this is best thing i have to offer. The thing i hope no one has to live one more day without.
ps i WILL be grammatically incorrect most of the time
youve been warned!
Related Posts Plugin for WordPress, Blogger...